Monday, October 12, 2026 · Coins & Currency
Vintage Plate Walls: Display Antique Dishes With a Personal, Collected Style
Noted by America's Antique Mall · 873 reads
A plate wall brings vintage dishes into view. Explore its history, choose pieces and hardware, and plan a display that suits your space.

A vintage plate wall turns dishes into a collection you can enjoy every day. A mix of antique plates, family pieces and hand-painted ceramics can give a room color, texture and a sense of history, while leaving the cupboard free for the pieces you still use at the table.
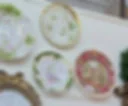
A display with a long history
Hanging plates has roots in 17th- and 18th-century Europe. Wealthy households displayed rare, imported Asian porcelain around their homes as a sign of taste and status. The idea returned to American interiors in the 1950s and 1960s, giving the plate wall a nostalgic quality for people who remember similar displays in relatives’ homes. The plate wall trend has moved through decades of decorating styles, and its appeal is easy to understand: it makes a collection part of the room rather than keeping it behind cupboard doors.
The format is flexible. A carefully arranged group of plates can bring a formal dining room to life, add warmth to a small kitchen or fill a wall that might otherwise hold paintings, prints or family photographs. The display can be orderly or deliberately eclectic, depending on the dishes and the room around them.
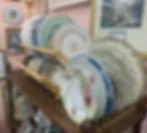
Choose dishes that belong together
There’s no need to build a display from a complete matching set. Different makers, patterns, colors and sizes can sit together comfortably, especially when a few details repeat across the arrangement. For a more unified look, choose pieces that share a palette, motif or maker. Those drawn to grandmillennial or Grandmacore interiors may enjoy the layered patterns and heirloom feel a plate wall can provide.
Think beyond dinner and salad plates. Platters, small glass trinket dishes, teacups and saucers may all work if they suit the design and aren’t too heavy or awkward to mount. A rectangular sterling silver serving platter, for example, can add a change of shape among round ceramics. Heirlooms, hand-painted pieces and commemorative plates can give the arrangement a more personal story.

Before settling on a piece, consider its weight, shape and condition, as well as how it will sit beside the other dishes. An attractive object still needs hardware suited to its size and form. A shallow bowl or platter may need a different hanging method from a standard plate.
Plan the layout before making holes
A little preparation can save effort and protect the wall from unnecessary holes. Trace each dish onto paper, cut out the shapes and tape them in place. Move the paper templates around until the arrangement feels balanced, then mark where each hanger should go. This lets you test a compact cluster, a wider display or a layout that follows the outline of furniture beneath it before committing.

Basic supplies include vintage dishes, hanging hardware such as wire hangers or adhesive discs, nails, wall hooks, a measuring tape, a level, a pencil and a hammer. Pliers are optional. Match the hardware and wall hook to the dish and the intended placement, and check that each piece is held securely before completing the display.
Two ways to hang the plates
Wire plate hangers are the traditional option. Their flexible, spring-loaded metal arms grip the rim of a plate, while a small loop at the top hangs from a nail, screw or hook. They’re useful for collectors who expect to change the display: remove the hanger, fit it to another dish and put the replacement in place. That flexibility also suits seasonal rotations or pieces that may return to the table as dinnerware. Wire plate hangers are one example of this style of hardware.
Adhesive disc hangers attach to the back of a dish and create a low-profile hanging point. Start with a clean, dry surface, then select a disc sized for the piece. Apply a small amount of glue to the back of the disc and wait until it becomes tacky. Center the disc on the back of the dish with its hanging ring positioned correctly, then allow it to cure for 24 hours before hanging.
The disc’s thin, unobtrusive profile can help a plate sit flush against the wall rather than tipping forward. That makes this method worth considering for shallow bowls and platters, where the shape may not suit a wire hanger. The trade-off is that the disc is attached to the dish, so think through placement before fitting it.
Make the collection feel considered
A display doesn’t need to be uniform to look intentional. Combining patterns, makers, shapes and sizes gives a wall an accumulated, collected character. If a more restrained effect suits the room, repeating a color or motif can tie varied pieces together without requiring a matching set.
Scale matters, too. Leave enough room for the shapes to be seen clearly, and use the paper templates to spot crowded areas before hanging anything. Once the layout is set, a measuring tape and level can help keep the placement consistent with the design. The result can be a fresh way to bring a cupboard collection into the open, with each dish contributing its own pattern, material or memory.
Plate walls have lasted because they adapt to different homes and collections. Start with pieces you like seeing together, plan their positions on paper, and choose hanging hardware that suits each dish. The best arrangement is the one that lets the collection feel at home on the wall.